I am part of a group on Facebook called Scrappy Girls Club The members post some neat things on there and occasionally I make some things. As the name indicates things normally just use scraps of material and for anyone that sews we have plenty of them.
A lady posted about making mini fabric Easter baskets. The link for the instructions are here. Now despite them being super cute they are very fiddly to make. I used some scraps of material I had left over from Paige's quilt, with some scrap pieces of green. The rabbit print is a multi directional print, but would you believe every rabbit is upside down on the baskets....LOL
This is what I put into the baskets. Stickers, a plastic egg filled with candy. Everything bought from the dollar store. The grandchildren are getting a toy also, as I figured they get enough candy from the "Easter Bunny!!"
It's a perfect size for the one egg. It's also a perfect size for a Kinder Egg or a Cadbury's Cream Egg.
I had half a dozen plastic eggs leftover, so I covered them with scraps of the Easter fabric using white glue. Went to the park and cut some twigs and bought the yellow eggs at the dollar store for my "Easter Tree." I am having to make a bit of an effort this year for Easter as I am hosting a lunch over Easter😏
Now I have to say the other project I am featuring is one of the best and useful things I have made in a long time. It's a Wonder Clip Cushion and the instructions for making it are here. This indeed does use just scraps of material. I am also finding my hands are getting stiffer and more arthritic as I am getting older. So this makes it so much easier to pick up the wonder clips.
I use a lot of Wonder Clips especially when I am sewing with cork as you can't pin cork as it will make holes in it.
Have you come across any neat projects that use scraps of material recently? Are you a member of the Scrappy Girls Club?
I am a British born, living in Canada since May of 1989. My blog is about all aspects of my daily life.
Showing posts with label blog links. Show all posts
Thursday, April 11, 2019
Friday, November 17, 2017
Paper clips...........
Do you know that the Paper Clip was invented in 1899 or 1901 depending on what you read by a Norwegian called John Vaaler.
There is an article here called 10 facts about Paperclips.
Do you remember back in 2005 when a Canadian traded a red paperclip and ended up with a house? You can read more about it here.
One of the most expensive paper clips must be this Prada one:
You can read more about it here. Personally I have better things to do with $185 USD.
Do you know paper clips are popular to use in arts and crafts? Neither did I, here is a couple of links that you may find interesting. Here and here.
Finally why did I write a post about paper clips..........no idea😊
There is an article here called 10 facts about Paperclips.
Do you remember back in 2005 when a Canadian traded a red paperclip and ended up with a house? You can read more about it here.
One of the most expensive paper clips must be this Prada one:
You can read more about it here. Personally I have better things to do with $185 USD.
Do you know paper clips are popular to use in arts and crafts? Neither did I, here is a couple of links that you may find interesting. Here and here.
Finally why did I write a post about paper clips..........no idea😊
Wednesday, February 13, 2013
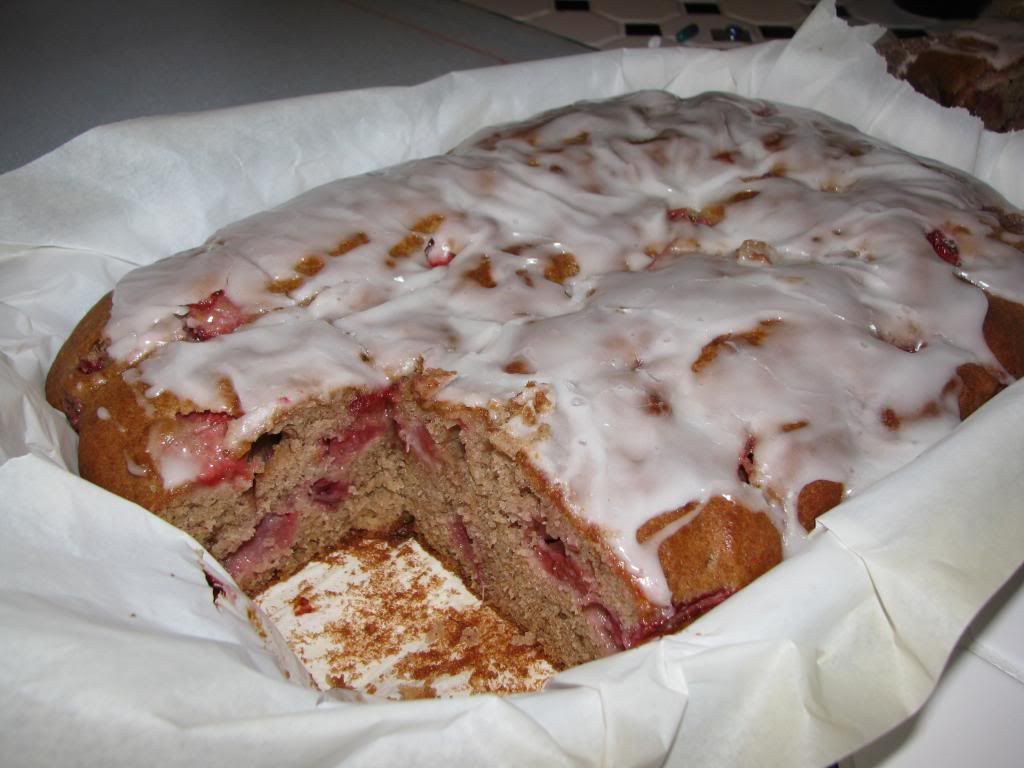
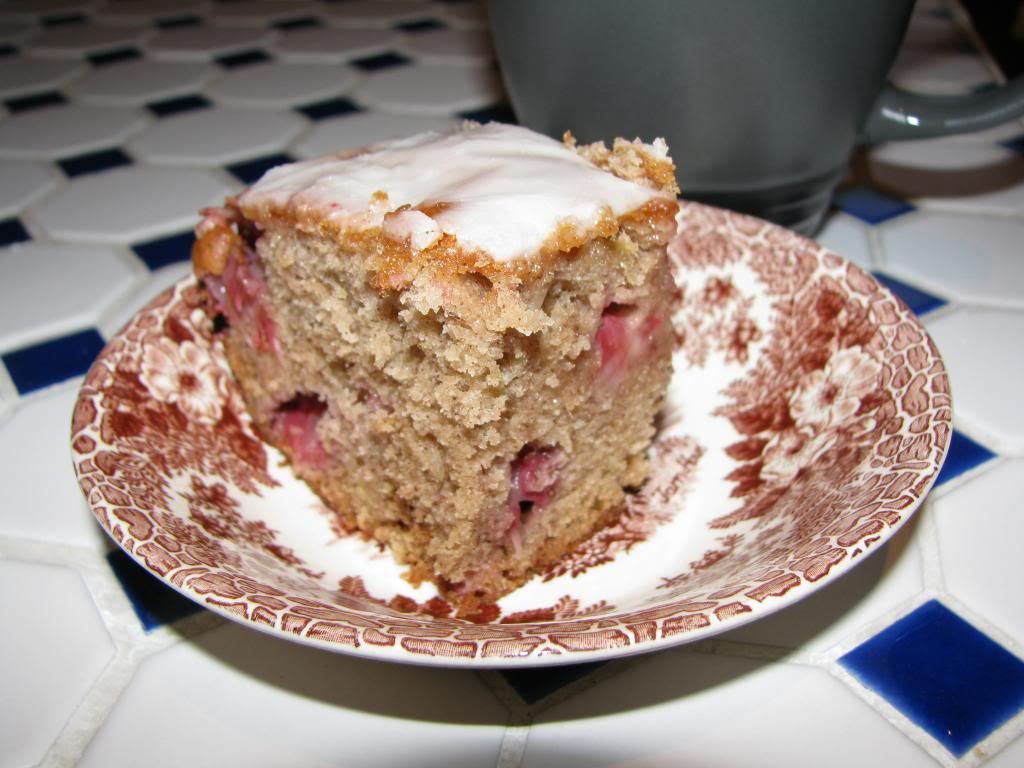
Strawberry-Banana Bread.....
Got this recipe from the March 2013 edition of Woman's Day Magazine and it's a keeper.
Strawberry-Banana Bread
Ingredients:
1 cup vegetable oil
3 cups all purpose/plain flour
2 tsp ground cinnamon
1 tsp baking/bicarb soda
1 tsp ground nutmeg
1/tsp salt
4 large eggs
1 1/2 cups granulated sugar
1 Tbsp vanilla extract
1 Tbsp grated lemon zest
2 large ripe bananas
1 lb strawberries, chopped
1 1/2 cups walnuts, chopped
1 cup icing sugar
2 tbsp fresh lemon juice
1. Heat oven to 350 oF Grease and line a 9 x 13 in. baking dish. In a large bowl, whisk together flour, cinnamon, baking soda, nutmeg and salt.
2. In a medium bowl, lightly beat the eggs. Add the granulated sugar, oil, vanilla and lemon zest and whisk to combine. Mash the bananas, (you should get about 1 cup) and stir into the egg mixture. Add the egg mixture to the flour mixture and mix until incorporated. Fold in the strawberries and walnuts.
3. Transfer the batter to the prepared baking dish and bake until a wooden pick inserted into the centre comes out clean, 45 to 50 minutes. Transfer to a cooling rack and let cool for 5 minutes.
4. Meanwhile, in a medium bowl, whisk together the icing sugar and lemon juice until smooth. Spread the icing over the warm cake, then let cool completely.
I didn't have walnuts or lemon zest so I didn't use either. You don't need to use the electric mixer for this, it can be all done by hand. I takes around 47 minutes to cook in a regular oven.
This makes a big pan and would be ideal to feed a crowd. The recipe although in the magazine is from The Casserole Queens and here is a link to their site
They also featured a wreath made of cupcake liners which is really neat.
Also here is a step by step on how to make it here
Strawberry-Banana Bread
Ingredients:
1 cup vegetable oil
3 cups all purpose/plain flour
2 tsp ground cinnamon
1 tsp baking/bicarb soda
1 tsp ground nutmeg
1/tsp salt
4 large eggs
1 1/2 cups granulated sugar
1 Tbsp vanilla extract
1 Tbsp grated lemon zest
2 large ripe bananas
1 lb strawberries, chopped
1 1/2 cups walnuts, chopped
1 cup icing sugar
2 tbsp fresh lemon juice
1. Heat oven to 350 oF Grease and line a 9 x 13 in. baking dish. In a large bowl, whisk together flour, cinnamon, baking soda, nutmeg and salt.
2. In a medium bowl, lightly beat the eggs. Add the granulated sugar, oil, vanilla and lemon zest and whisk to combine. Mash the bananas, (you should get about 1 cup) and stir into the egg mixture. Add the egg mixture to the flour mixture and mix until incorporated. Fold in the strawberries and walnuts.
3. Transfer the batter to the prepared baking dish and bake until a wooden pick inserted into the centre comes out clean, 45 to 50 minutes. Transfer to a cooling rack and let cool for 5 minutes.
4. Meanwhile, in a medium bowl, whisk together the icing sugar and lemon juice until smooth. Spread the icing over the warm cake, then let cool completely.
I didn't have walnuts or lemon zest so I didn't use either. You don't need to use the electric mixer for this, it can be all done by hand. I takes around 47 minutes to cook in a regular oven.
This makes a big pan and would be ideal to feed a crowd. The recipe although in the magazine is from The Casserole Queens and here is a link to their site
They also featured a wreath made of cupcake liners which is really neat.
Also here is a step by step on how to make it here
Subscribe to:
Posts (Atom)
Taking a break.......
back in a while. Nothing wrong...........
-
For those over a certain age and especially is you're British born, you will remember Hilda and her Murial in Coronation Street? Well wh...
-
For the long time blog readers, you'll remember I set up a "sewing company" called Appleby Lane, which I made sewn items to se...
-
It's that time of year where I set up my yearly savings pot. I print out the sheet from Medium Sized Family . Click on the name and i...